Keysets
This tutorial introduces another essential feature in Pact known as keysets. We’ll discuss what keysets are, why they’re important, and how they help regulate access to Pact modules.
Tutorial Overview
- Introduction to Keysets
- Create a Keyset
- Define and Read a Keyset
- Create Keys
- Sign to Deploy a Contract
- Sign to Call a Function
- Sign to Run a Contract
Key Takeaway
Pact Keysets specify authorization to different parts of the smart contract. They determine which accounts have access to which parts of the program. They also contain keys which are an important part of acquiring the signatures needed to verify a transaction.
Pact Keysets Tutorial
Subscribe to our YouTube channel to access the latest Pact tutorials.
Introduction to Keysets
Pact Keysets specify authorization to different parts of the smart contract. They determine which accounts have access to and update various parts of the program.
Create a Keyset
The first step toward working with keysets is to create one. Creating a keyset can be done using the online editor within the environment section.
Navigate to pact.kadena.io
Steps to create a keyset
- On the right panel navigate to ENV > Data > Keysets > Enter a Keyset Name
- Enter admin-keyset
- Click Create

You should now see admin-keyset appear under your list of available keysets.
This keyset is now added into the browser’s local storage. When you begin working locally, this keyset will need to exist in the .repl file that you create along with your .pact file. You will learn more about this process in later tutorials.
Define and Read a Keyset
After creating a keyset, you need to both define and read this keyset from within the smart contract you create. This is done using a pair of built-in functions; define-keyset and read-keyset
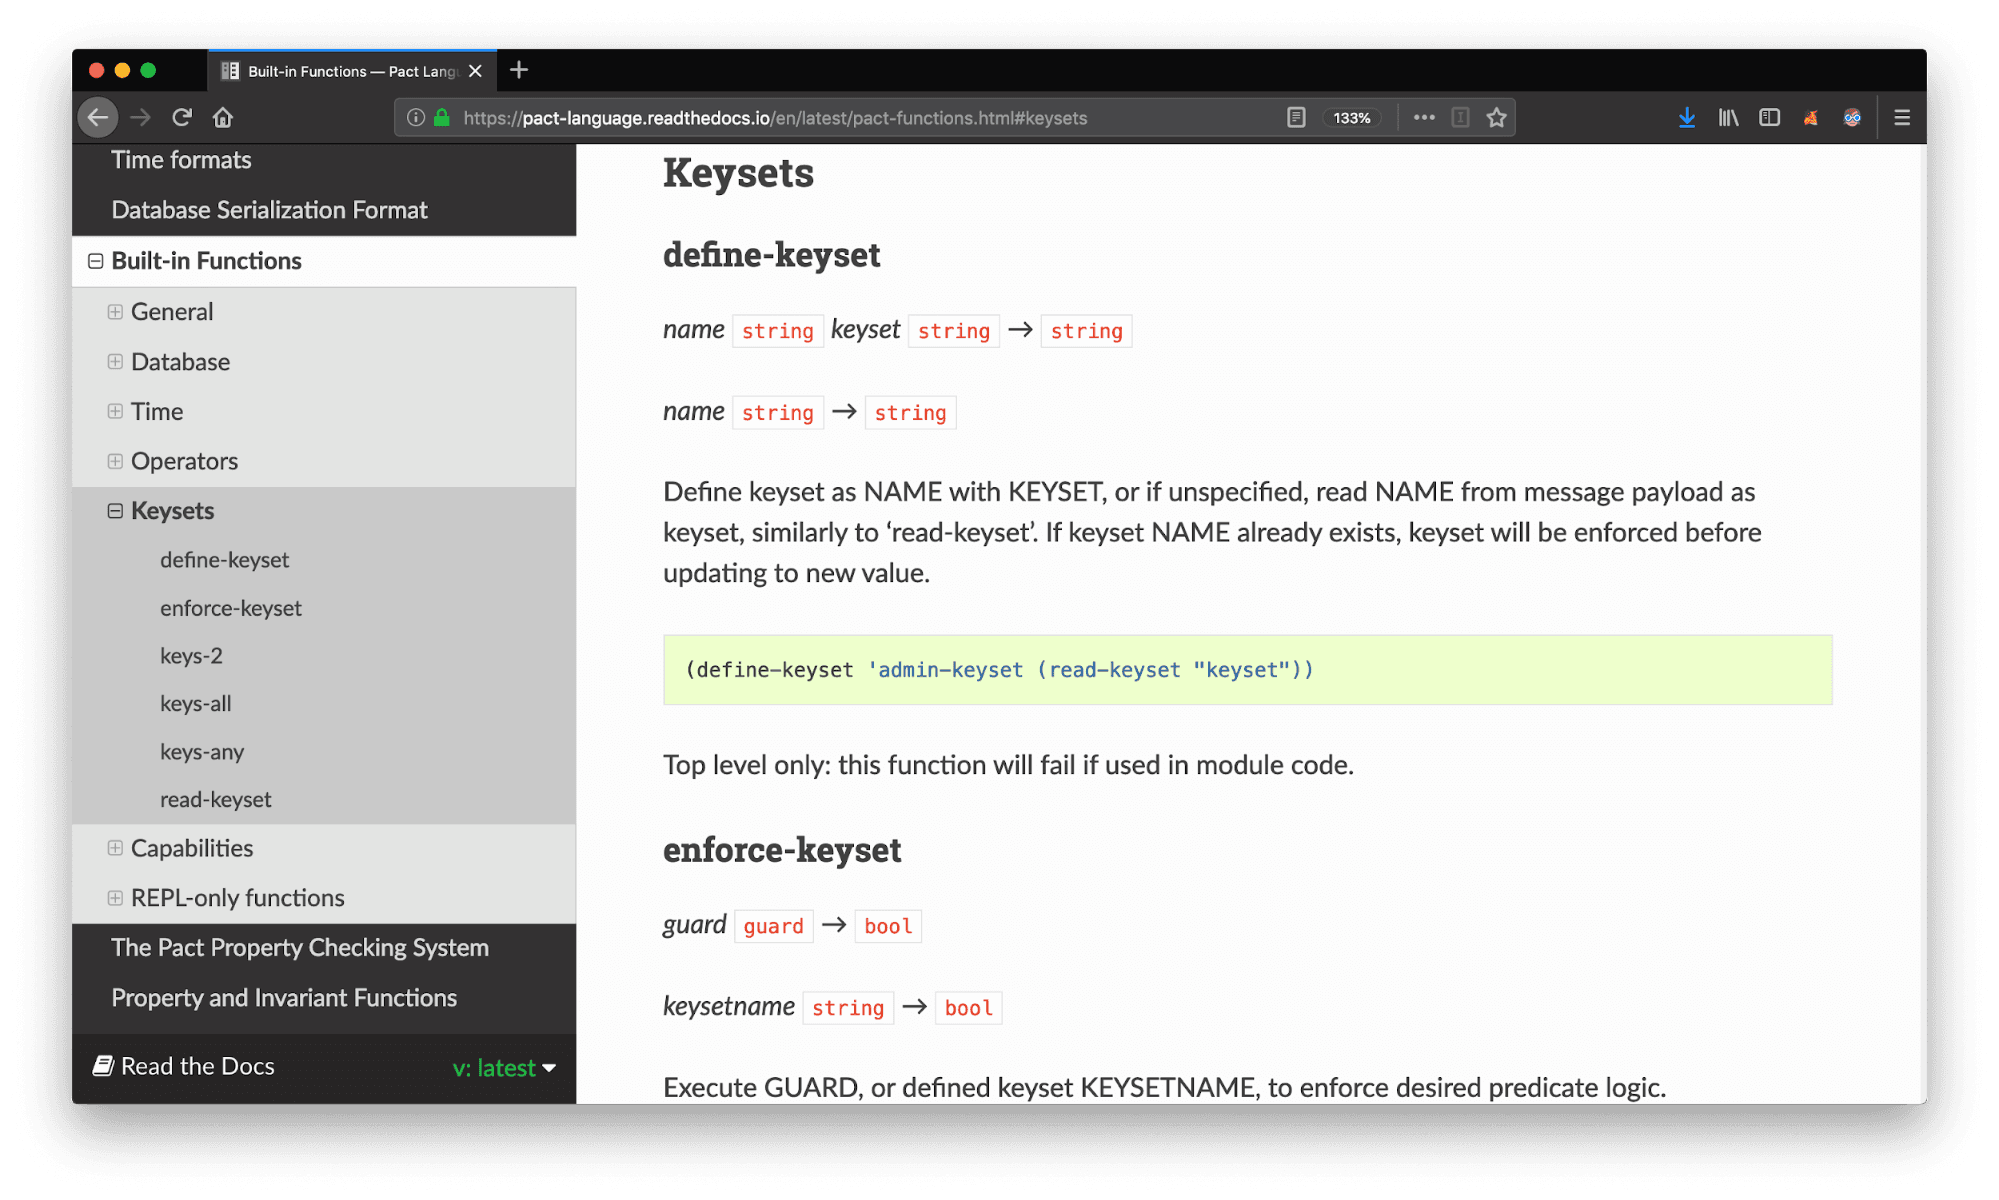
Here is the syntax used to define and read a keyset named “admin-keyset”.
(define-keyset 'admin-keyset (read-keyset "admin-keyset"))(define-keyset 'admin-keyset (read-keyset "admin-keyset"))Keysets guard the logic encoded within a module, these functions should be placed above the module and will fail if written within the module code.
The single quote, ‘, preceding the admin-keyset is an alternative way to represent a string rather than using double quotes. It is, in this case, referred to as a symbol and helps syntactically represent a unique item during runtime.
Create Keys
The keyset you have created is meant to hold keys. These keys are used to sign and verify transactions that occur from within the module.
Steps to create a key
- On the right panel navigate to ENV > Wallet > Enter a key name
- Enter admin-key
- Click Generate

You should now see the key name, the public key, and the private key of the key you generated.
While one key is enough to get started, this tutorial will show you some other key options that are available to you. For that reason, take some time now to generate two more keys.
Generate two more keys
- admin-key-2
- admin-key-3
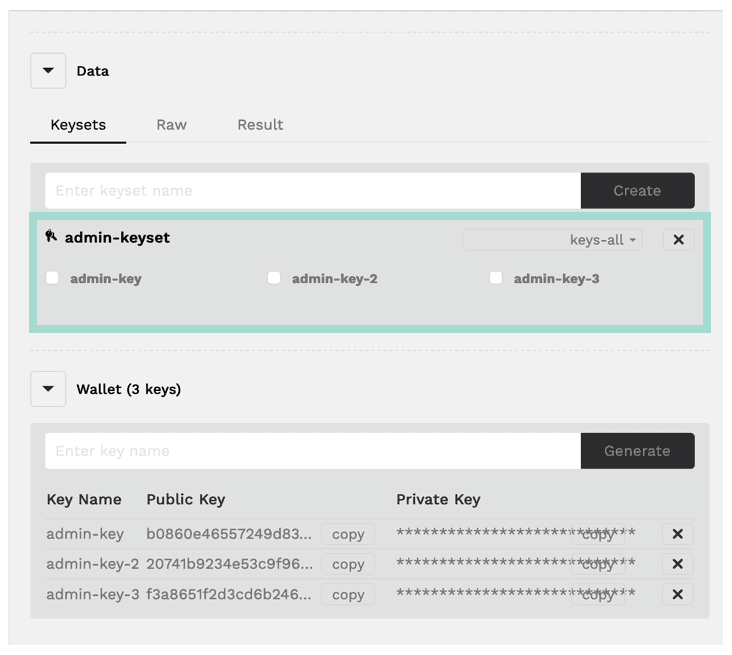
After creating these keys, notice that they are all available as checkboxes under the admin-keyset. Select each of these checkboxes now.
You’re now ready to use these keys to help understand predicate functions.
Predicate Functions
Alongside the keyset you created, you will see a dropdown that allows you to select keys-all, keys-2, and keys-any.
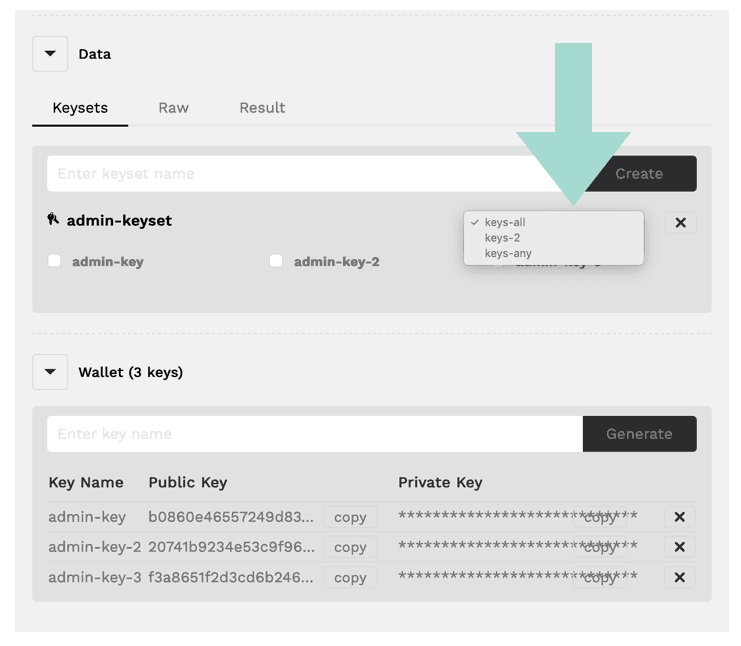
These options are referred to as the predicate functions in your keyset.
A predicate function is a boolean value function evaluating to either true or false. In this case, it will be one of the options keys-any, keys-2, or keys-all as you had seen in the keysets tab.
Predicate functions specify which keys need to sign the transaction for it to be valid.
| keys-all | All available keys must sign the transaction to verify it. |
| keys-2 | Two keys must sign the transaction to verify it. |
| keys-any | Any single key can sign the transaction to verify it. |
The keys that the predicate function is referring to are those you selected with the checkboxes
Which option to choose?
Determining which is appropriate for your application depends on what you are trying to accomplish.
In cases where all members of a group are equal, and it is important for each of them to sign the transaction, then you will use keys-all. If there are many members of the group but only a few need to verify the transaction, keys-2 could work well. And if anyone signing is enough to verify the transaction, select keys-any.
In simple smart contracts, you will generally have a simple keyset, a single key, and a default value of keys-all for your predicate function.
Result
Each key created has an equivalent JSON representation you can view from the Result tab.
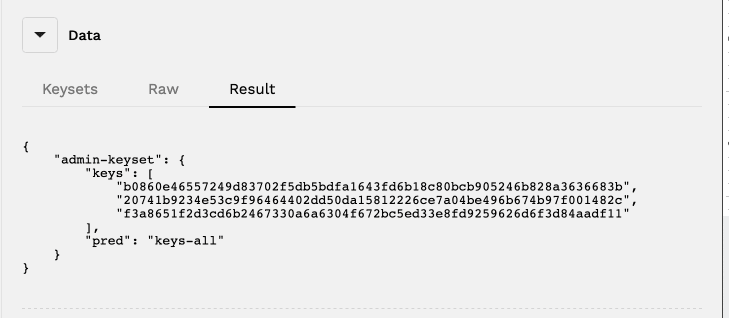
Notice that this JSON object includes the name of your keyset, the public key of each of the keys you added to the keyset, and the current value of the predicate function you selected.
Raw
You can also create keysets using the JSON format rather than the user interface. Creating keysets with JSON is done using the Raw tab.
This format will be used in real dApps or in .repl files for simulation. It allows you to copy your JSON formatted keysets to test and deploy on pact-web, allowing you simply copy and paste into this box rather than re-creating everything from scratch.
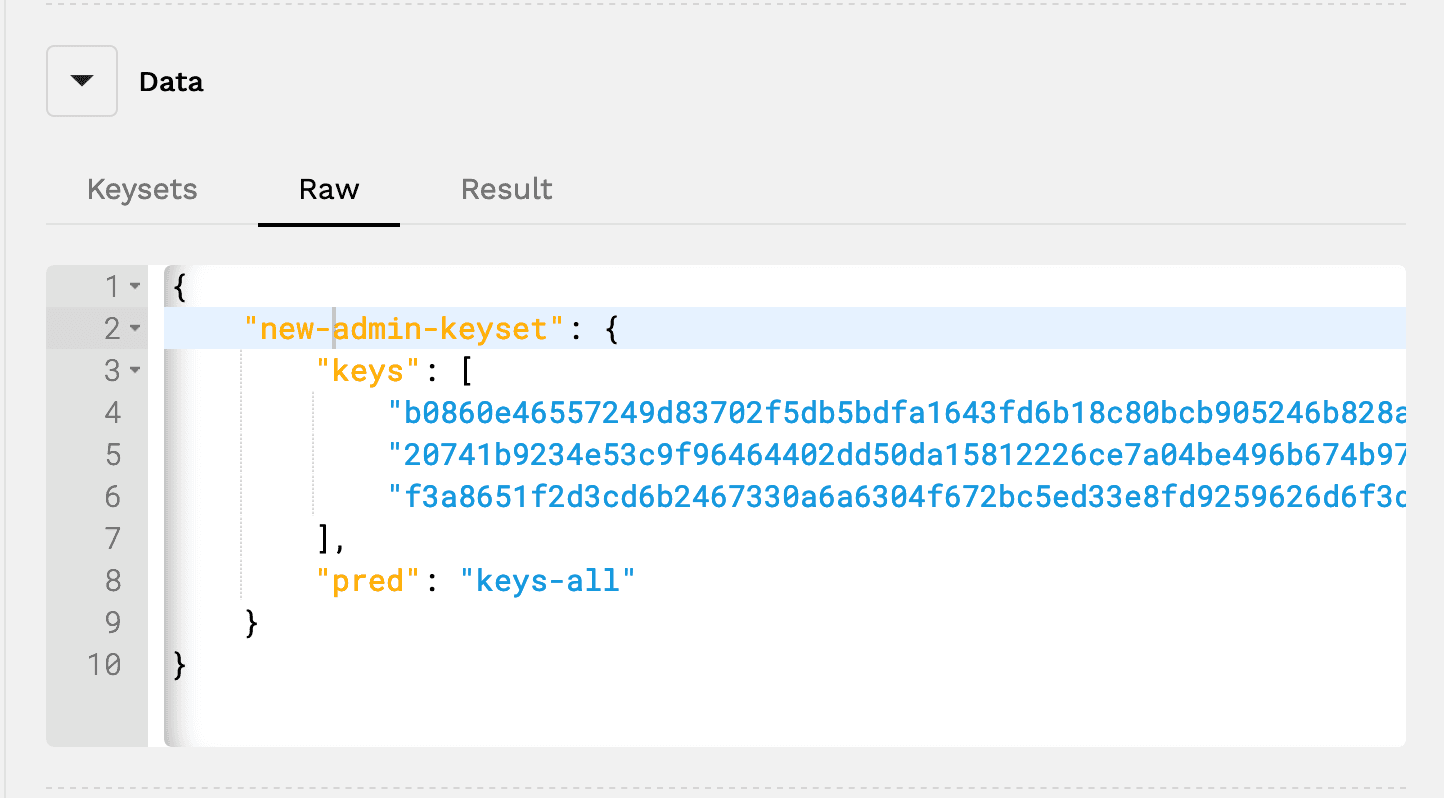
To create a new key, specify a keyset name, keys, and pred, similar to the format seen in the Result tab.
While keysets tab is a simple way to create new keysets on the website, raw tab is a simpler way of inputting keysets that already exist.
Keysets created here will not appear in the Keysets tab, but they will appear in the Result tab.
Sign to Deploy a Contract
Verifying transactions with keysets is important when deploying a smart contract. You can check this out for yourself from the deployment screen in the online editor.
Where to find the sign tab
- From pact.kadena.io select Deploy
- From the deployment settings screen, choose Sign
You should now see the following screen, which includes the keysets and specified keys from within the module.
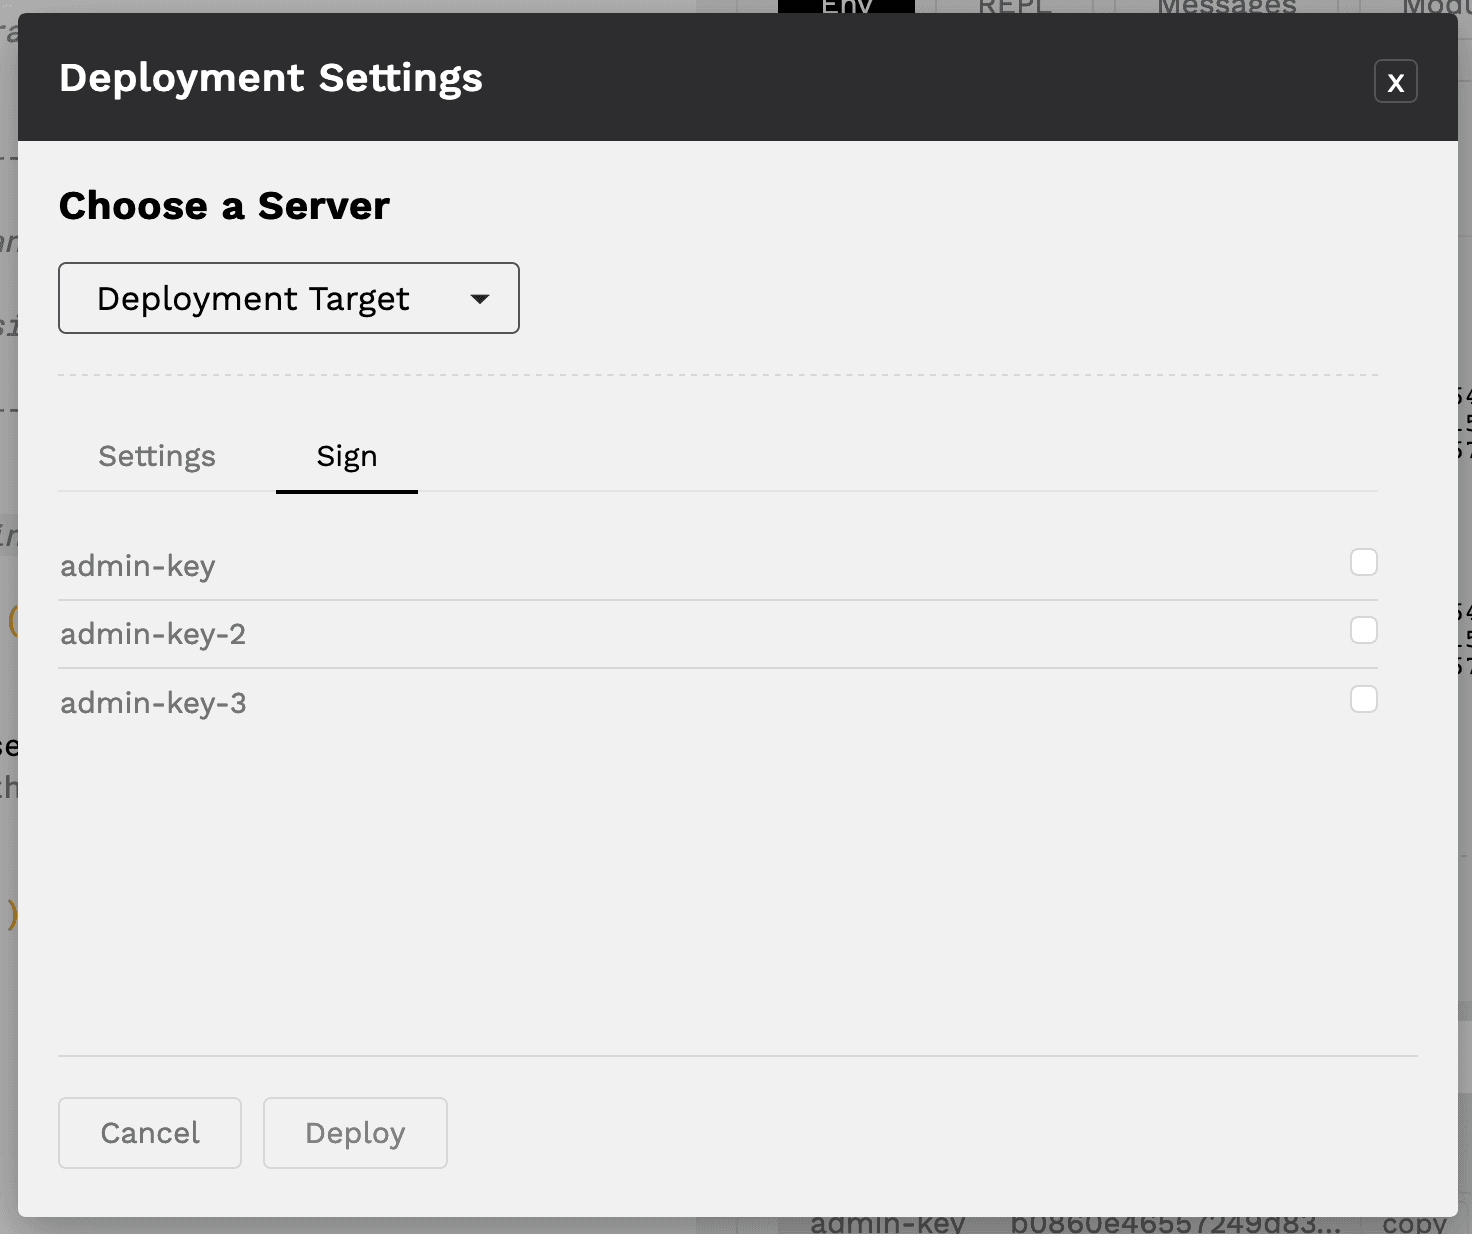
To deploy the smart contract, you will need to select a number of keys using the checkbox to the right as specified in the predicate function. This will ensure that your smart contract is successfully verified.
There are a few necessary changes you will need to make to your smart contract to deploy it that are unrelated to keysets. For that reason, you won’t be deploying your contract in this tutorial. You can check out the Hello World with Pact tutorial if you’d like support on deploying a smart contract.
Sign to Call a Function
Calling a function on a deployed contract is another time where key signatures become valuable.
You cannot call any functions from the sample contracts in the Online Editors Module Explorer. Contracts must first be deployed to a blockchain before you are able to call them. For this and future examples, be sure to look under deployed contracts to call functions.
To get started, view the helloWorld smart contract in the module explorer and call the hello function.
Steps to call the hello function
- Select Module Explorer
- Search helloWorld
- Select View
- Select >_Call
After calling the function, you should see a screen showing the Parameters of the function.
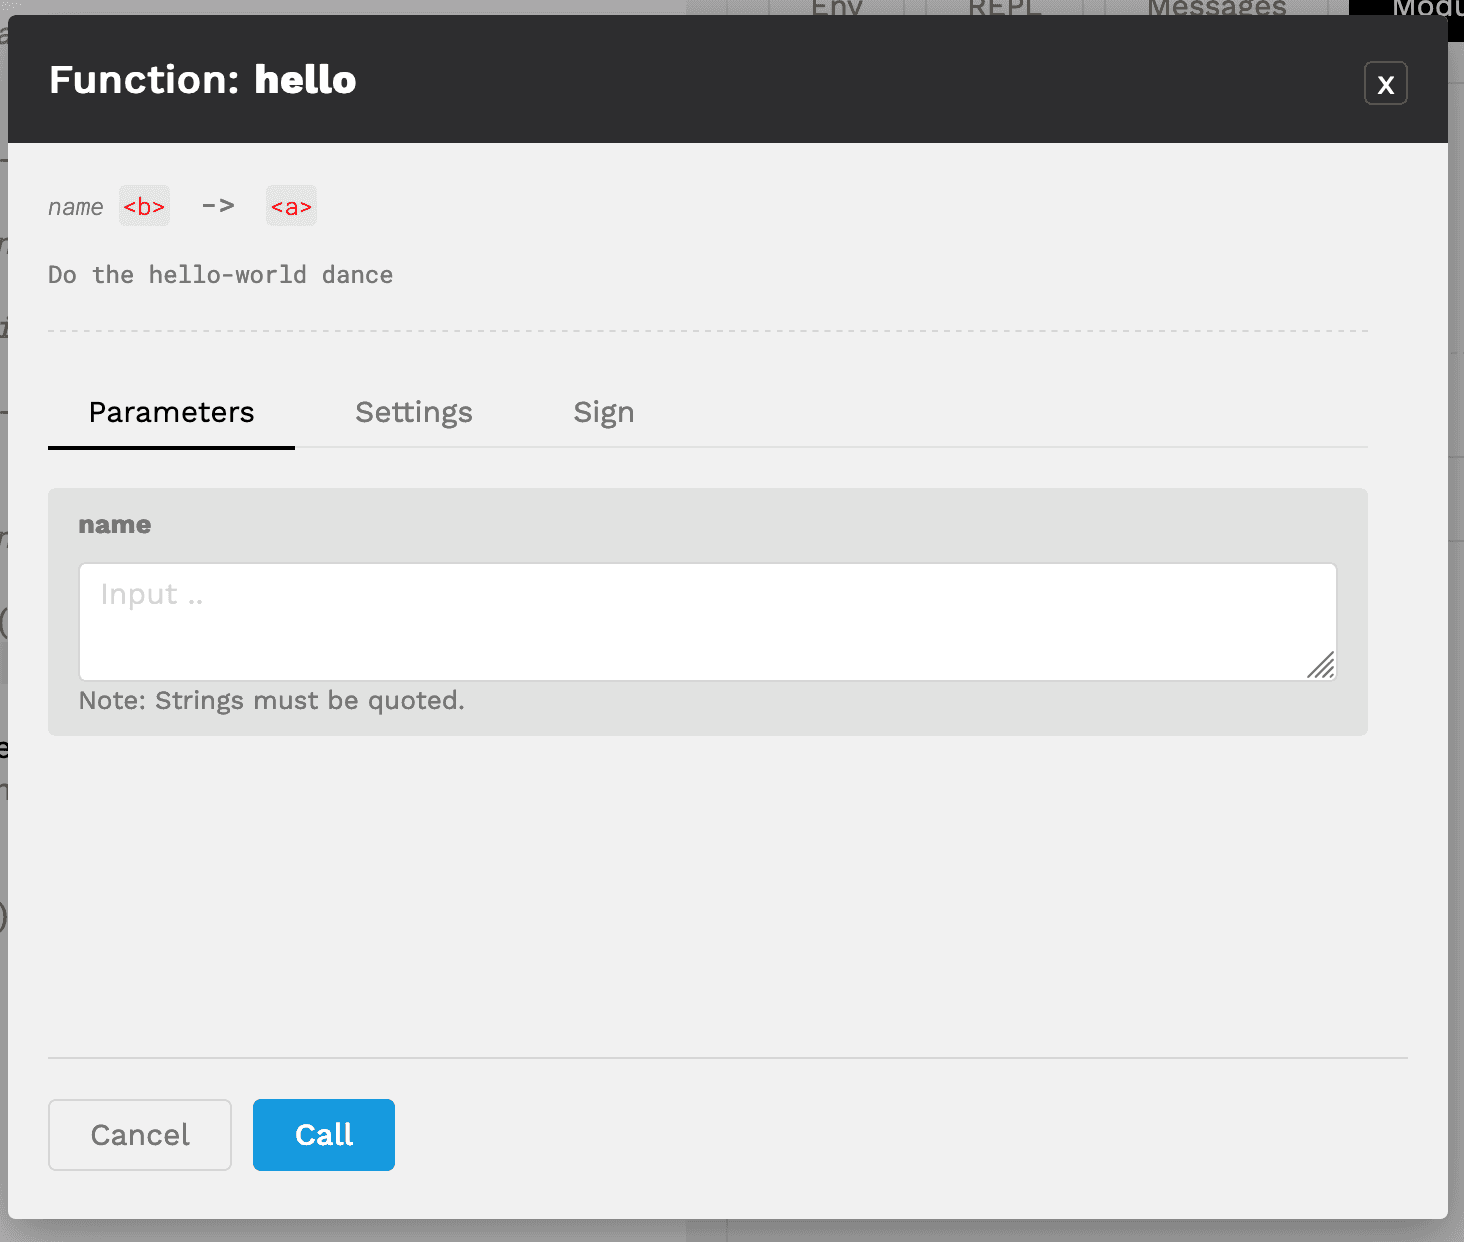
Select the Sign tab to the right of Parameters to view the keys available to use for signatures.
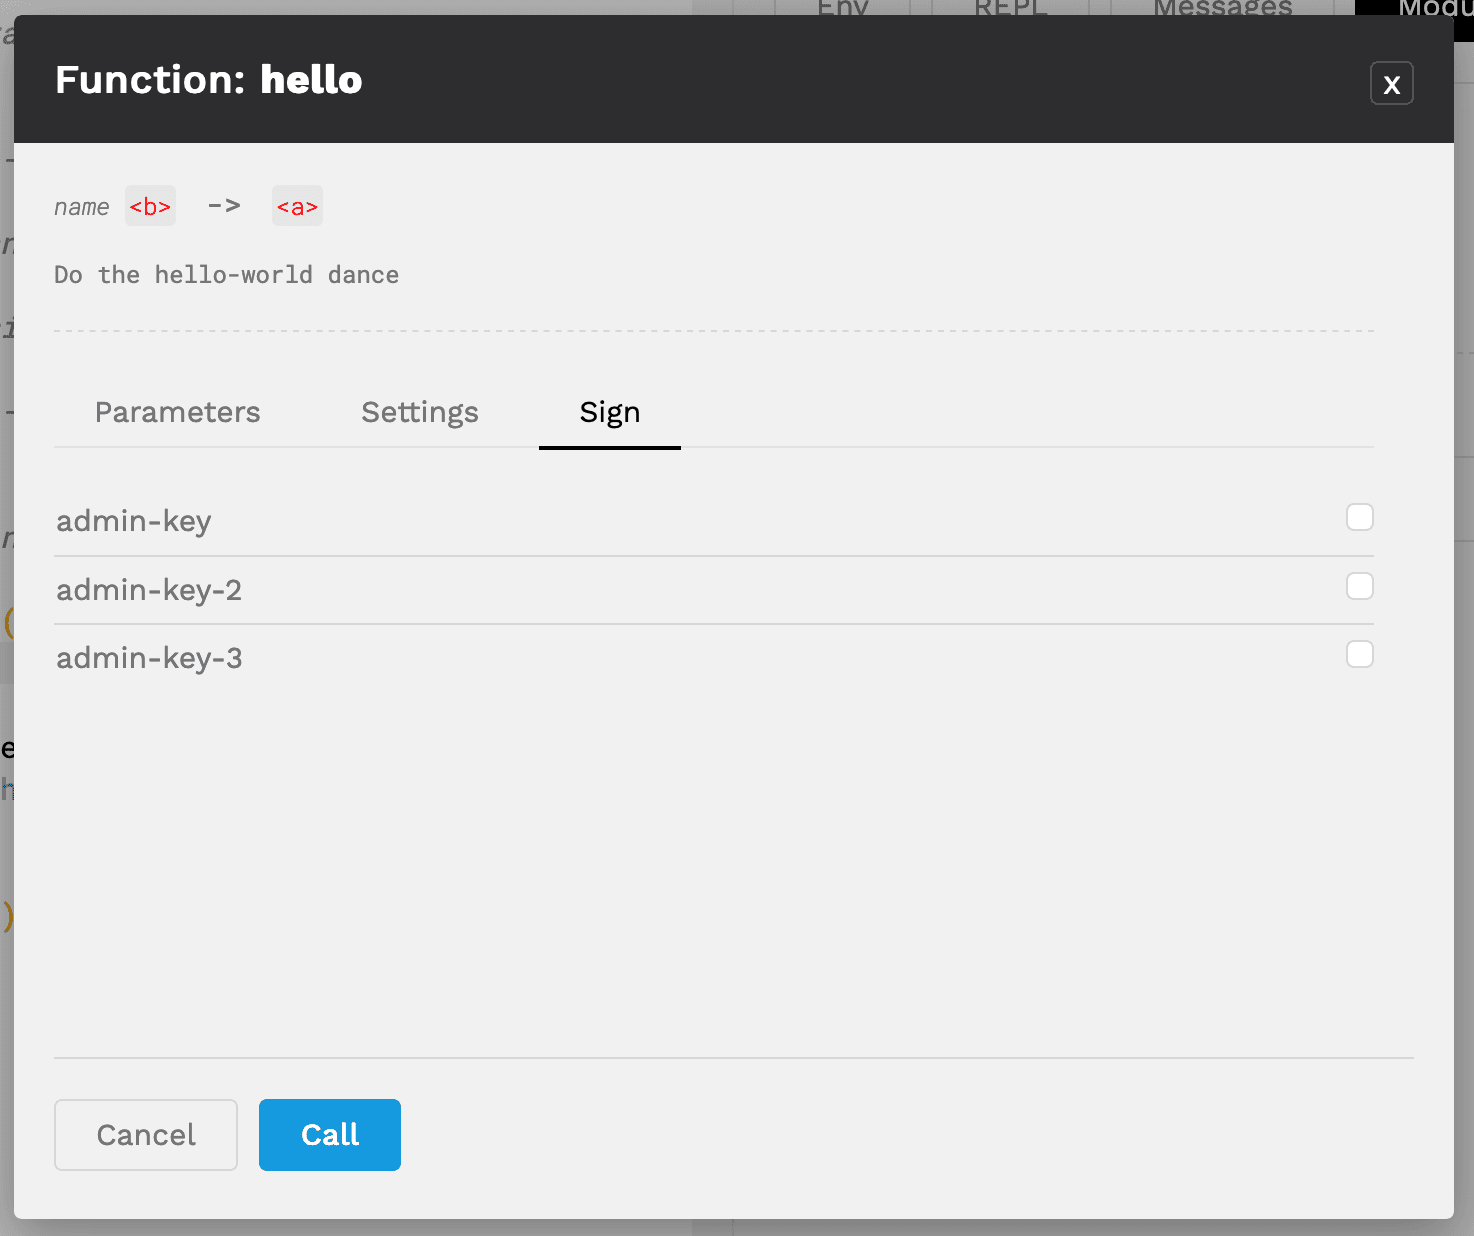
Here you should again see each of the keys you have available to sign the transaction. In this case, the helloWorld contract does not have any signature restrictions so you can call the function without these. That said, it’s also fine to sign with a key now to get some practice.
Select the checkbox next to one of the admin-keys, and go back to the function parameters screen.
Type “Pact Keys” (or whatever you prefer) as a Parameter and click Call to call the function.
After calling the function, you should see “Hello Pact Keys” appear in the messages tab.
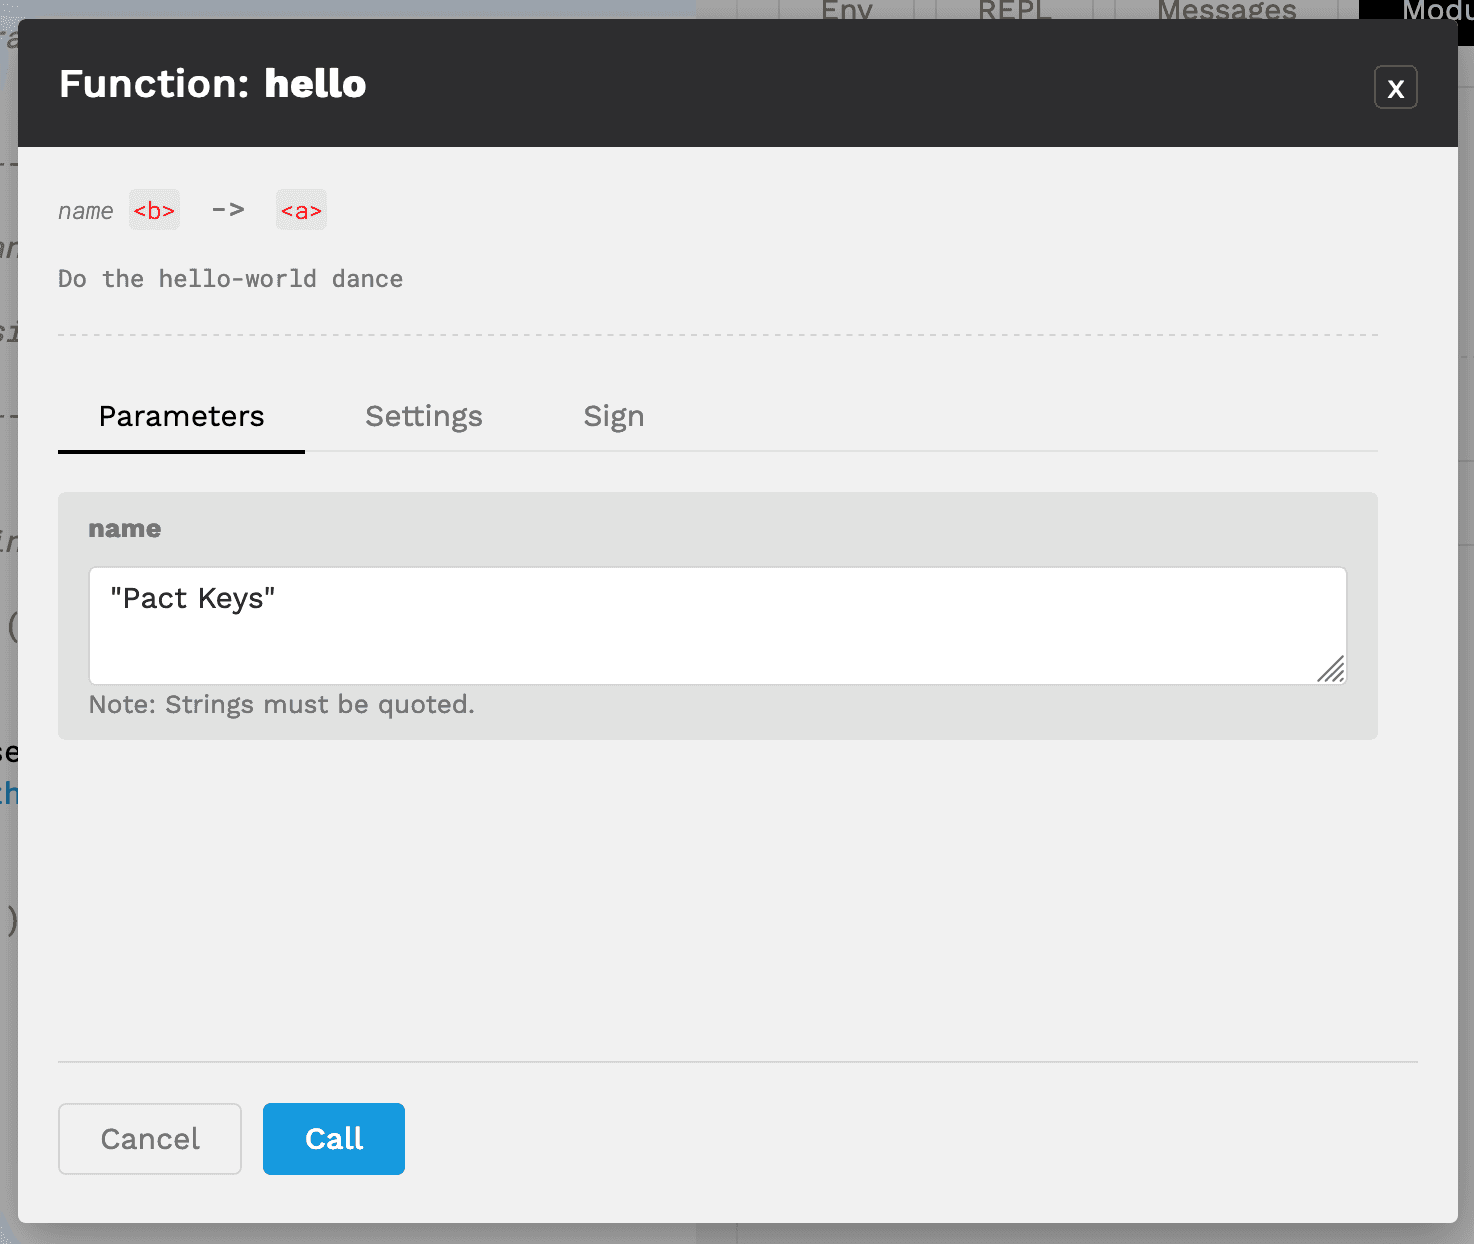

You have now verified a transaction using a key signature on a deployed smart contract. Again, it wasn’t required for this specific contract but this is a very simple way to get familiar with the process for when you need it later.
Sign to Call a Function
It’s helpful to go through a process where you actually have restrictions on running code based on the keysets you have available. These restrictions can affect both your ability to load a contract into the REPL and the ability to call functions on a deployed contract.
One example that does a good job exploring keysets and restrictions is the Simple Payment example.
Navigate to Simple Payment example
- Select Module Explorer > Examples > Simple Payment > Open
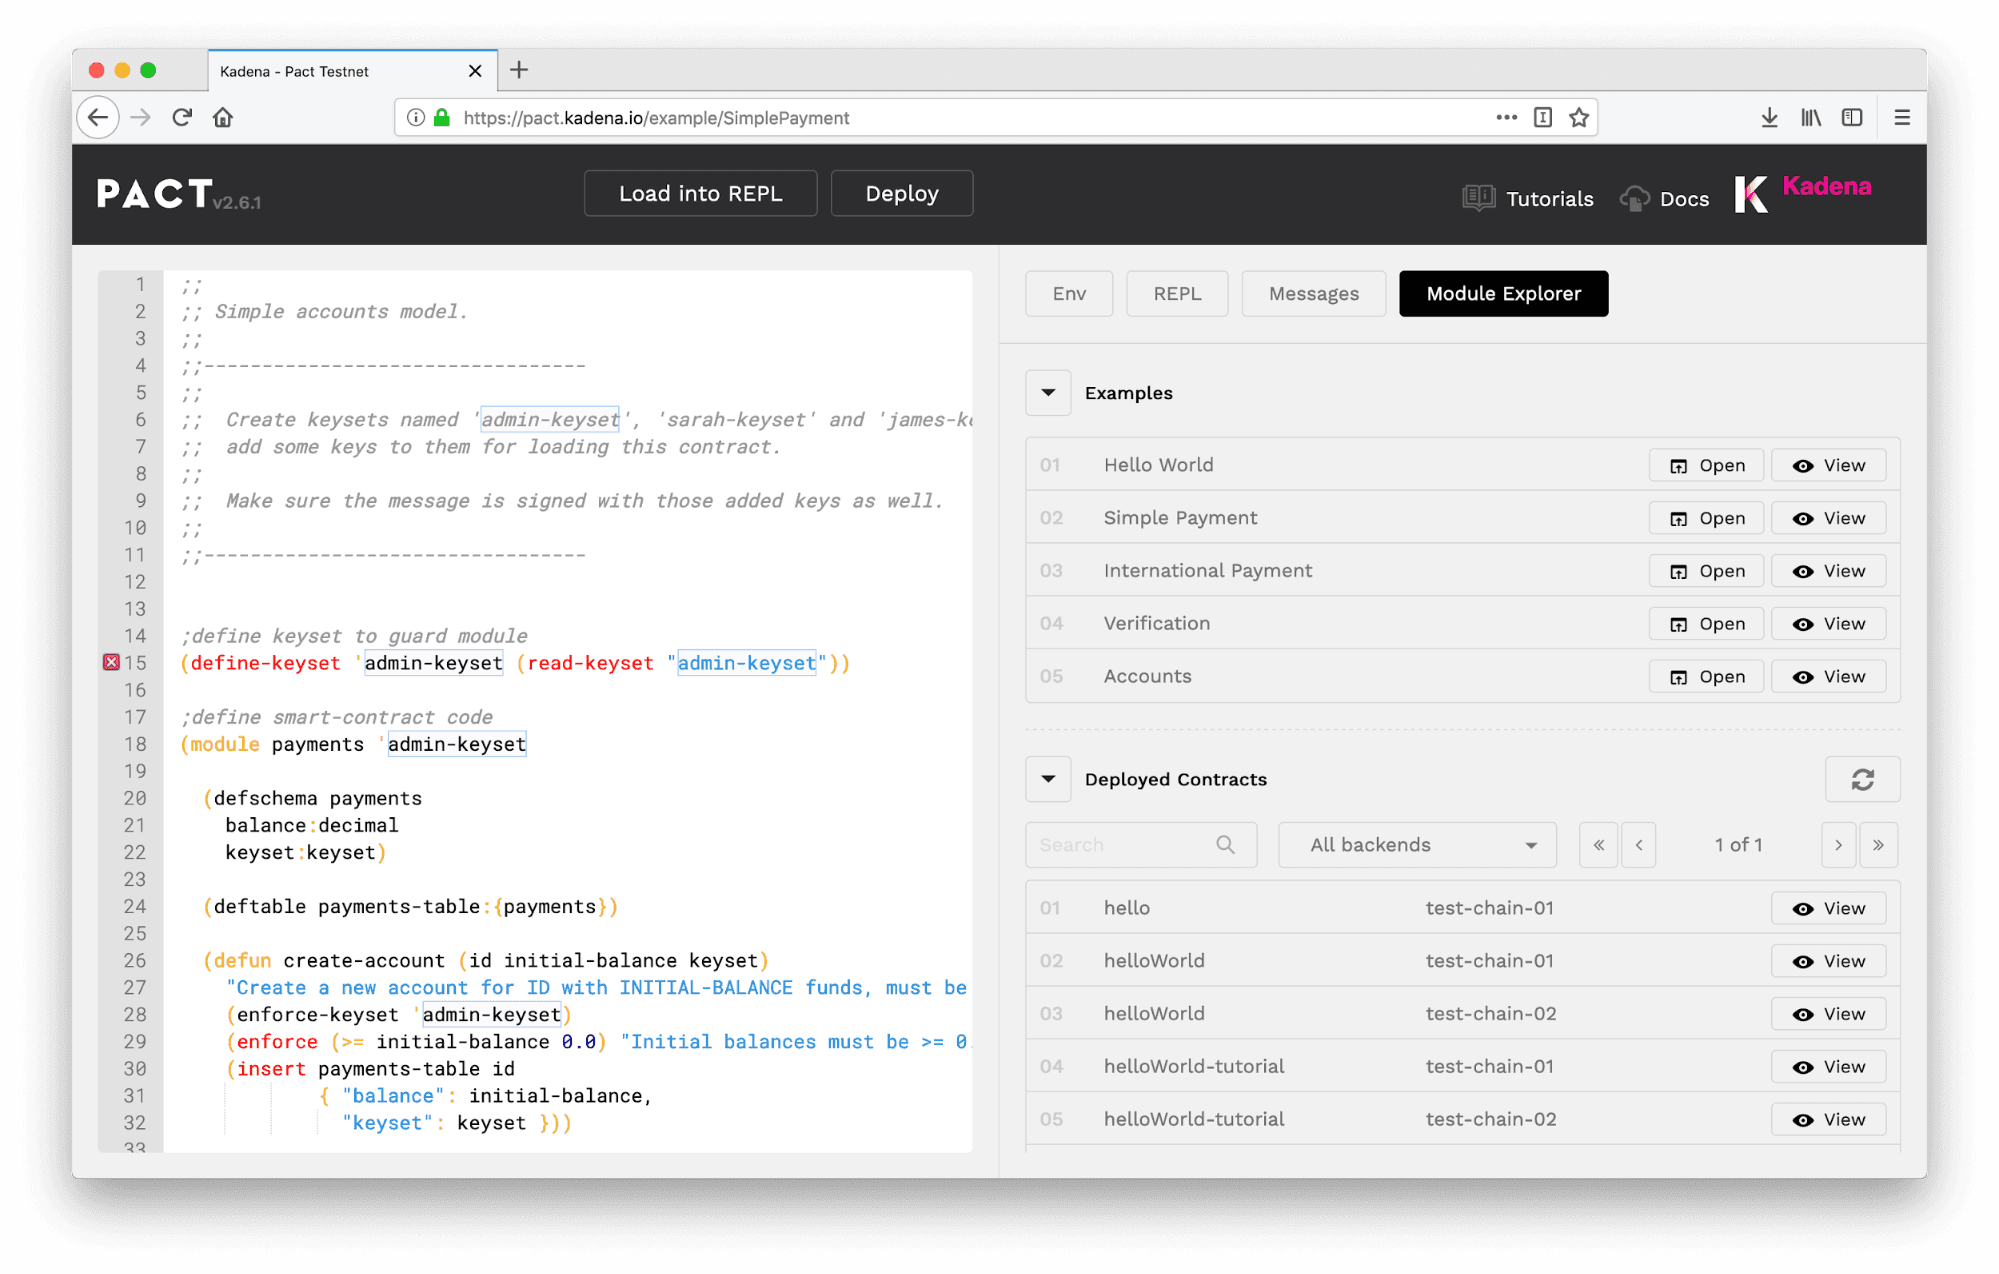
You will be building a smart contract like this for yourself in a later tutorial. For now, you’ll focus on a few critical areas that illustrate how to set keyset restrictions from within a module.
Enforce-keyset
Throughout the module, you’ll notice the following built-in function. enforce-keyset
This function executes a guard or defined keyset name to enforce desired predicate logic.
You can find an example of this on row 28 of the Simple Payments smart contract which is summarized below.
...code ;; row 14: define keyset to guard module(define-keyset 'admin-keyset (read-keyset "admin-keyset")) ...code (defun create-account (id initial-balance keyset) ;; row 27: "Must be administrator." (enforce-keyset 'admin-keyset) ...code ...code ;; row 14: define keyset to guard module(define-keyset 'admin-keyset (read-keyset "admin-keyset")) ...code (defun create-account (id initial-balance keyset) ;; row 27: "Must be administrator." (enforce-keyset 'admin-keyset) ...code Here is how the code sample above is working
-
Before the module, the admin-keyset is defined and read.
-
Once in the contract, a function named create-account is created that takes keyset as a parameter.
-
Upon running the function, enforce-keyset is called to check the caller is the owner of admin-keyset.
-
If the caller is the owner of admin-keyset, the function continues.
-
If the caller is not the owner of the admin-keyset, the function fails.
Using this method, you can check that the caller of any function is the owner of a keyset that you specify.
Challenge
Try running this code in the online editor using Load into REPL. You’ll notice an error appear. Can you fix the error based on what you have learned so far?
When you get the following response you have successfully fixed the first error.
<interactive>:61:31: No such key in message: "sarah-keyset"<interactive>:61:31: No such key in message: "sarah-keyset":::info Feeling Stuck?
Create a keyset named admin-keyset from within the Env to remove this error.
:::
In the next section, you will address the remaining errors.
Enforce-one Keyset
Another useful built-in function for checking keysets is known as enforce-one. enforce-one
This built-in function runs a series of tests in a specific order to check that one of the following statements are true.
You can find an example of this on row row 38 of the Simple Payments contract and is summarized below.
...code ;; row 14: define keyset to guard module(define-keyset 'admin-keyset (read-keyset "admin-keyset")) ...code ;; Row 34: define keyset to guard module (defun get-balance (id) "Only users or admin can read balance." (with-read payments-table id { "balance":= balance, "keyset":= keyset } (enforce-one "Access denied" [(enforce-keyset keyset) (enforce-keyset 'admin-keyset)]) balance)) ...code ;; row 60: create accounts (create-account "Sarah" 100.25 (read-keyset "sarah-keyset"))(create-account "James" 250.0 (read-keyset "james-keyset")) ...code ...code ;; row 14: define keyset to guard module(define-keyset 'admin-keyset (read-keyset "admin-keyset")) ...code ;; Row 34: define keyset to guard module (defun get-balance (id) "Only users or admin can read balance." (with-read payments-table id { "balance":= balance, "keyset":= keyset } (enforce-one "Access denied" [(enforce-keyset keyset) (enforce-keyset 'admin-keyset)]) balance)) ...code ;; row 60: create accounts (create-account "Sarah" 100.25 (read-keyset "sarah-keyset"))(create-account "James" 250.0 (read-keyset "james-keyset")) ...code Similar to the previous example, this example is enforcing that the caller be the owner of the admin-keyset. Unlike the previous example, it is also allowing the caller to be the owner of their account.
Enforce-one is meant for running all types of tests. It is not specific to checking for keysets. In this context, it is running tests to check keysets and works as an effective way to enforce that a specific keyset exists.
Notice how it is doing this using enforce-one paired with enforce-keyset.
Enforce-one starts a series of tests to check that any of the following lines are true.
If one of them is true, the caller will gain access to run the rest of the function. If neither of them is true, the caller will get a response that their request has been denied since they are not the owner of one of the required keys.
What this means is that both the admin and owner of the account can view their balance, but no one else can.
Bug
Try running the code in the online editor using Load into REPL. You’ll notice an error appear. Can you fix the error based on what you have learned so far?
When you get the following response you have successfully fixed the first error.
James's balance is 275.0James's balance is 275.0:::info Solution Create two keysets from within the Env to remove this error.
  * sarah-keyset
  * james-keyset
:::
After creating these keysets the response signifies that you have successfully deployed the smart contract into the REPL.
Question
Investigate the smart contract to try and determine why you are getting the response that James's balance is 275.0. Can you tell what is happening in this smart contract to produce this outcome?
If you cannot tell, don’t worry. You will get a much more detailed overview of this smart contract in a later tutorial.
Deploy the Contract
You are now ready to deploy the Simple Payments smart contract. For information on deploying a smart contract, view Deploy to the Testnet from the Hello World with Pact tutorial.
Deployed Payments Contract Function Call
Now that you have the appropriate keys and keysets, you can also run the deployed version of this smart contract.
From the module explorer, view the module deployed in the previous section.
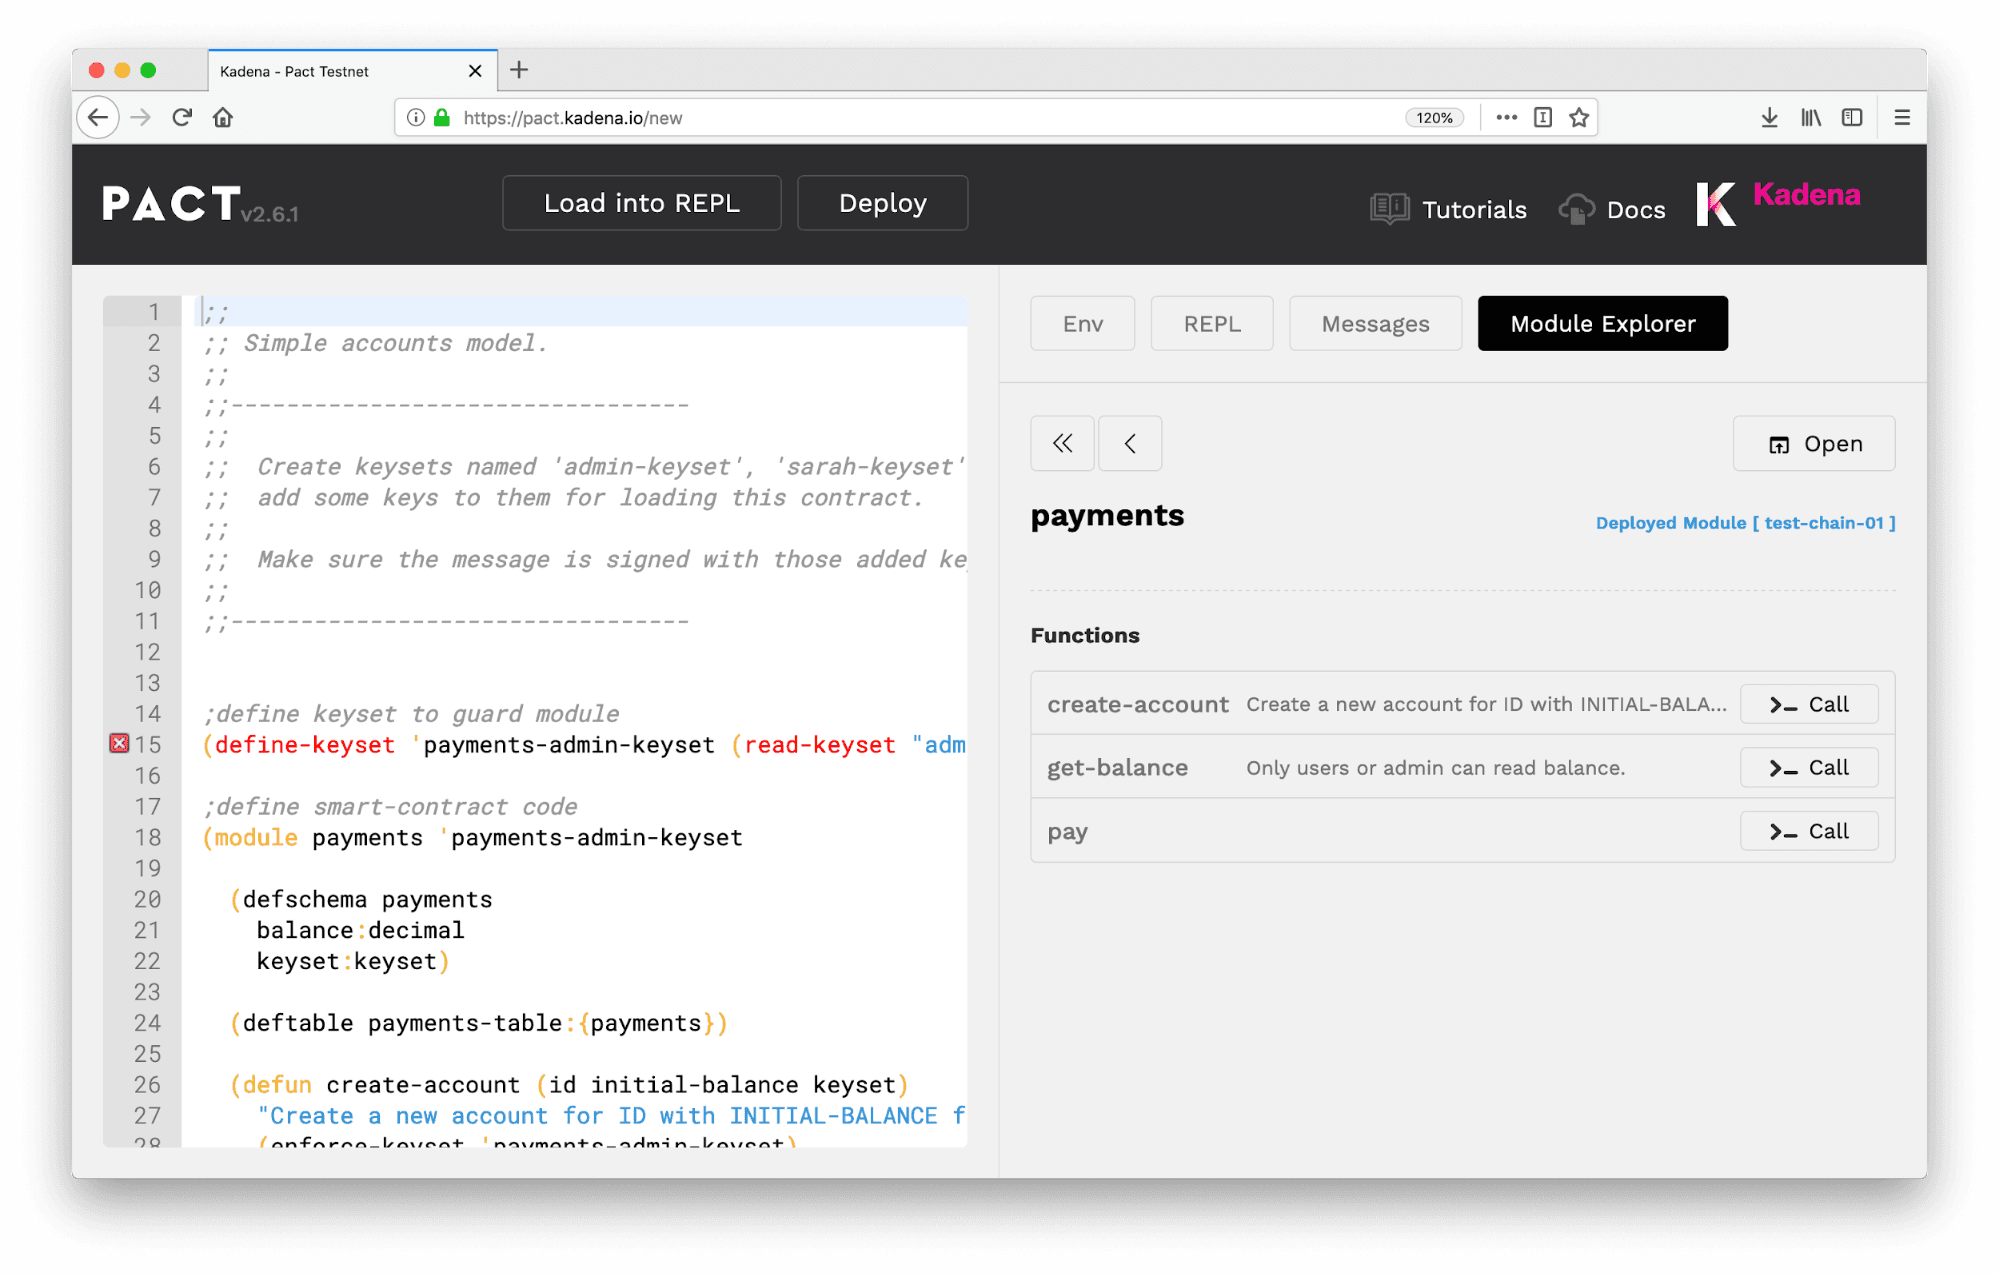
Select the get-balance function to attempt to view James’ balance. To do this, select parameters, and type “James” as the id.
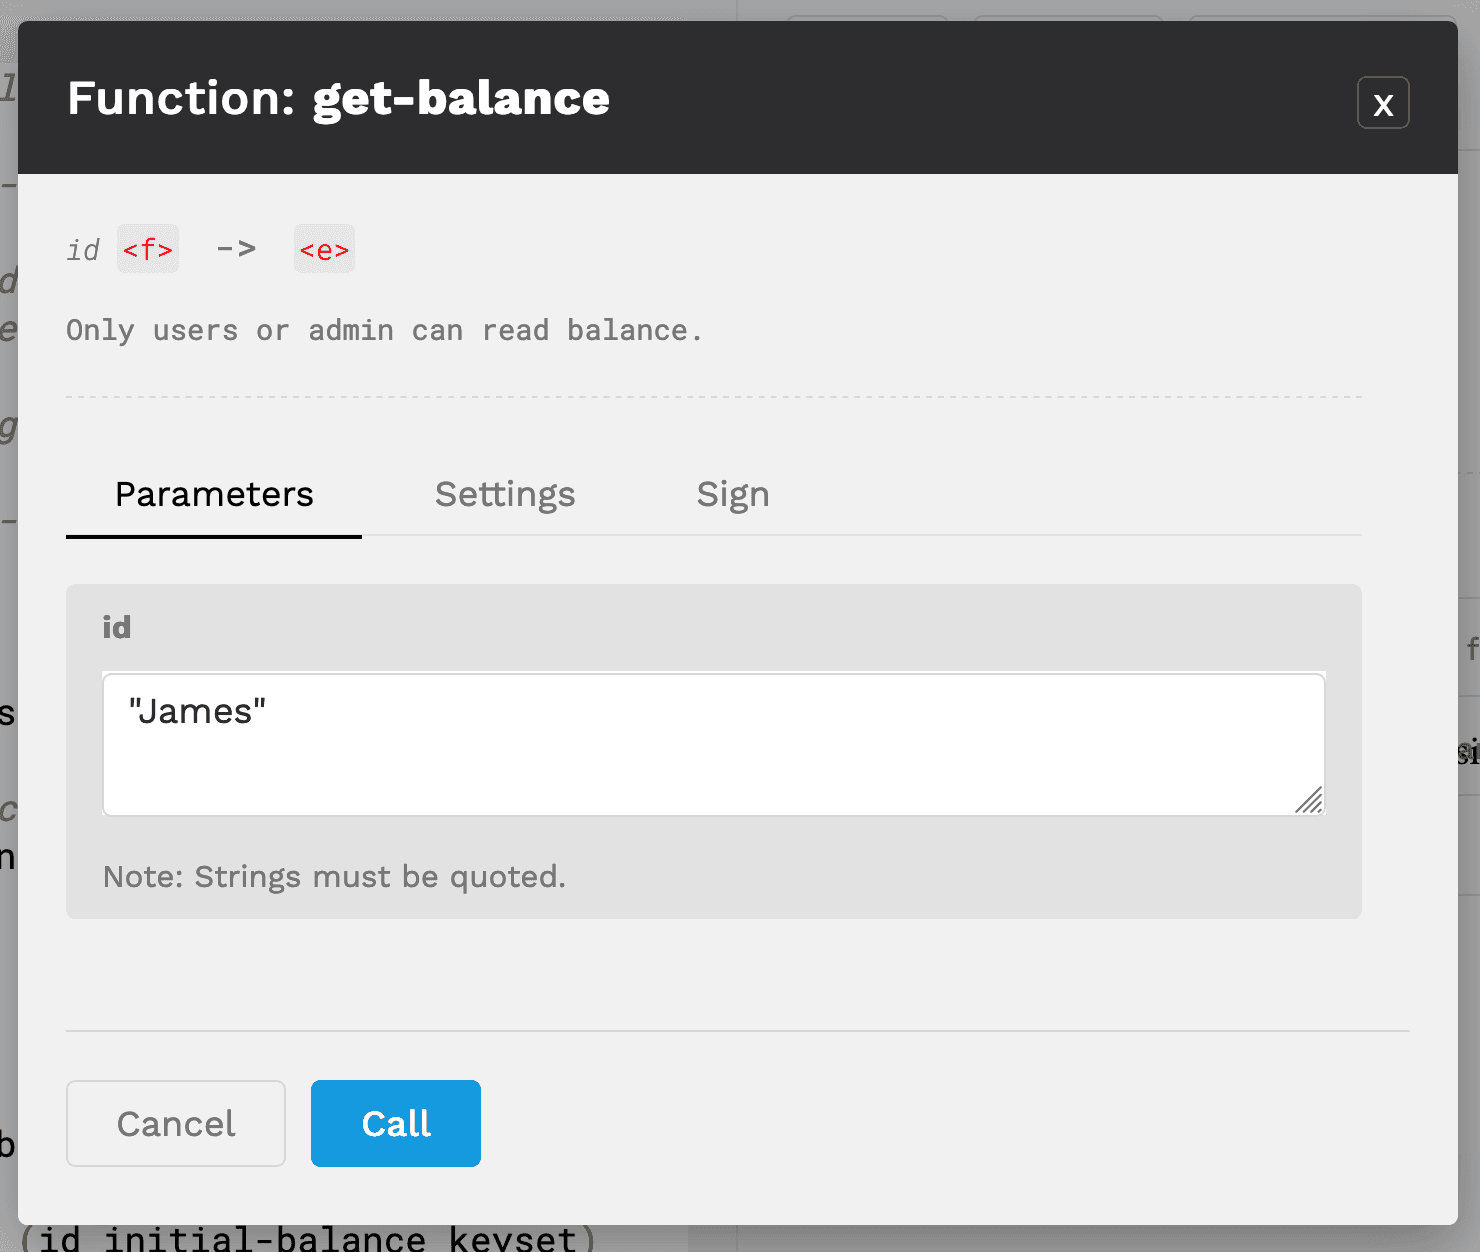
Next, sign the contract with either the admin-key or the james-key. As shown earlier, each of these should have the authority to read James’ account balance.
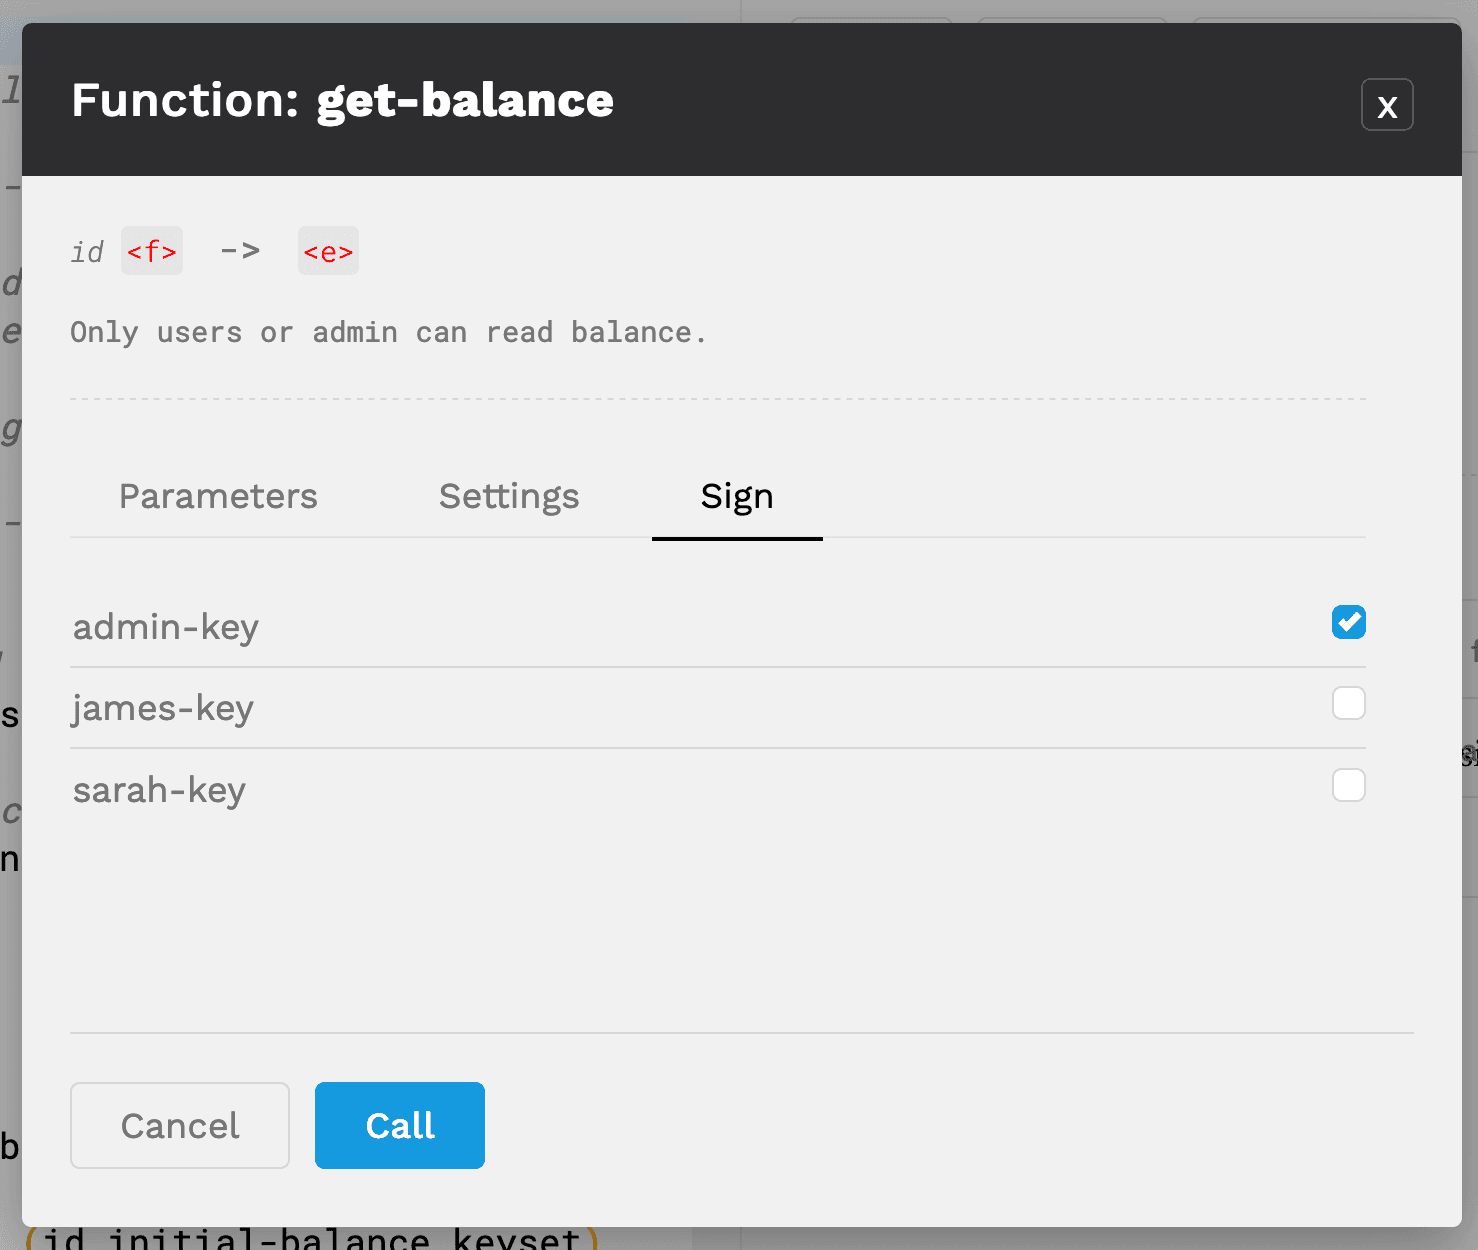
After selecting call, you should see the James’ balance displayed. If you’d like to test that it is working correctly, you can also try to make this function call by signing with sarah-key. When doing this, you should receive an error since Sarah is only permitted to view her own balance.
Using these ideas, you can call any function on the smart contract by giving the proper function parameters and signing the transactions with the appropriate keys.
Review
That wraps up this tutorial on Pact Keysets.
As you learned, Pact Keysets allow you to specify authorization to different parts of the smart contract. They help determine which accounts have access to which parts of the programs you create.
Throughout this tutorial you to created, defined, and read keysets. You also created keys, were introduced to predicate functions, and learned a few other options available to work with keys from the online editor. You also saw where to go to utilize these keys both when deploying a contract and calling a function. Finally, you experimented with running an existing smart contracts that had built-in keyset restrictions.
Managing permissions can be difficult, and really depends on the needs of your application. For that reason, it’s difficult to show all of the possibilities that may come up with keysets. That said, this tutorial tried to give a strong foundation for what options are available, and variations of these ideas will come up often in later tutorials.
Take some time now to experiment with keys and keysets, and when you’re ready, move on to our next tutorial.